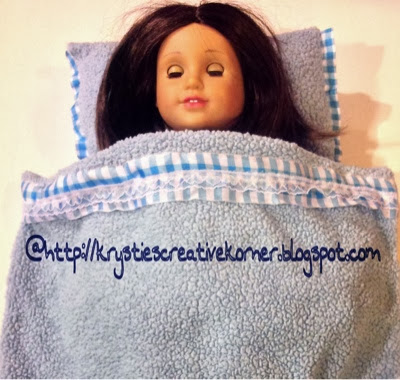
This American Girl Doll is now happier than ever; keeping warm in this new cozy blanket and pillow.
She may soon be quite disappointed when she learns that this bedding set was not made for her.
The bedding set will be shipped out next week to my grandmother in New York. Baby Grandma is the name we called her growing up. To differentiate between our grandparents we gave them special names. Baby Grandma got her name because she would take care of babies for part time work. She is now living in a facility for seniors and has recently been carrying around a baby doll. Taking very good care of it I must add!
I felt a little guilty taking this blue bathrobe out of the bag that was waiting to be delivered to a Goodwill store as it was in great condition. However it was altered for a good purpose.

I couldn't help but take a picture of our bird, Nipper, as every here and there I would feel him on my feet while I was sewing.

Other than the bathrobe this project needed very little supplies to complete. I had fabric that I purchased in the clearance section, which I used for the inside of the blanket. Ribbon for decoration, heart lace trim, and stuffing for the pillow.
 The blanket was made from the back part of the bathrobe.
 You can see the fabric on the left side of this picture which was cut to the same size as the bathrobe piece. The measurement was approximately 20" x 24".
This two pieces will be sewn together after the ribbon and lace trim are sewn to the blanket front.
I almost ditched the idea of using the lace trim because I was not happy with the yellow tint on part of the lace. Then the lightbulb went on! Remove the yellow tinted lace from the heart lace!

The ribbon and lace trim were cut to fit across the blanket front. The bottom of the blanket gets the ribbon only while the top will have the lace trim sewn on the ribbon.

Now the fun part, using my new electronic sewing machine!
 Whoo hoo that was fun!
  With the right sides facing each other, all sides were sewn together . Of course a small opening was left to enable turning the blanket inside right. Being so out of practice, I almost did forget to leave that opening!
 It certainly did not look profession but yet, I was ok with it. I am pretty notorious for not completing projects, so I was happy with knowing that I was going to finish this project!
{}{}{}{}{}{}{}{}{}{}{}{}{}{}{}{}{}{}{}{}{}{}{}{}{}{}{}{}{}{}{}{}{}{}{}{}{}{}{}{}{}{}
{}{}{}{}
The Pillow
The pillow was made simply from an arm of the bathrobe.

 The cuff was removed.
 Arm piece was cut to approximately to
5" x 11".
 The arm piece was then turned inside out.
 Two pieces of ribbon were cut to the length of the openings on both sides.
The next thing I wanted to do was to fold the ribbon in half so it wasn't as wide. I thought of pinning the ribbon after folding it to hold it in place but then I decided against that; thinking that it would be way too thick to put under the needle later.
So I decided to try a new technique with a product that I have never used before. It is a product called Peel n Stick, fabric fuse. I thought this would be good to use as it even says it is to be used on ribbon.

 I think they should change the name of this stuff to Stick n Peel. I spent too much time trying to peel it so I can then stick it! If you have ever used this stuff, you know, that you have to stick it and then peel it.
 This stickiness held the fabric together very well. Peel n Stick definitely offers crafters a convenient method of gluing fabric together. I will find many uses for this sticky peely stuff.
 After laying the prepared ribbons between the two layers of fabric, with the folded edge towards the inside, it was time to sew! Remember to keep an opening on one of the sides in order to turn the pillow inside right.
 Hmm, everything was going smoothly except I had noticed a buildup of lint on my needle. In this picture you can see it slightly where the screwdriver tip is pointing.
 It had become obvious that the Peel n Stick glue was affecting my needle.
  Out of curiosity I had to look at the back of the package. Sure enough in capital letters; the package says Do Not Sew!
The pillow was then stuffed with stuffing.
 The opening can be closed by handstitching or by using using some Peel n Stick.
And there you have it a pillow to match your blanket for an 18 inch doll!
This project was enjoyable to make. Yes it was very simple and basic, but I did it without a pattern while saving money by recycling the bathrobe.
The fact that this robe was out grown by one of my kids makes this blanket set even more special. My grandmother will now have a piece of us all the time!
come join the party:
Best of the weekend party

<a href="http://alittleclaireification.com/wp-content/uploads/2014/01/2014-Best-Of-Weekend-Button.jpg" /></a>


What a clever way to use a bath rob. The blanket and pillow was a great idea.
ReplyDeleteHave a great week,
Bev